Pro Tip: Changing SPM Output Files


A couple of weeks ago, alert reader Paula DiNoto asked about how to output SPM files in NIFTI format instead of ANALYZE (.hdr/.img). Apparently, for those of you bleeding-edge adrenaline junkies who just have to have the latest thing, SPM12 doesn't give you this option in the interface. SPM5, however - you know, the one that the rest of us barbarians use - still does. (I'll save my gloating for when I meet you face-to-face at the conferences.)

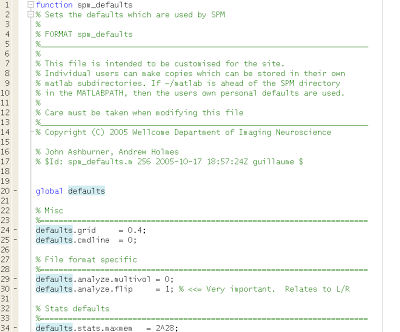
Getting back to the story, I had to admit to Paula that I was, for the first time in my life, unable to figure out how to troubleshoot the problem. However, this was merely a ruse to get Paula motivated; she ended up solving the problem by changing "spm_defaults.m" and changing the default.images.format field to 'nii'. Obviously I already knew this, but I was pleased to see her figure it out for herself.


Thanks again to Paula, whom I once called, in a moment of self-forgetfulness, the most wonderful person I had ever met.

How to Fake Data and Make Tons of Money, Part 2: CreateNIFTI.m

After you've been working in science long enough, you may start to discover that the results that you get aren't necessarily the ones that you want. This discrepancy is an abomination, and clearly must be eliminated. One way to do this - at least with FMRI data - is to manually read in a dataset, and overwrite existing values with new ones.

While you can overwrite values in any dataset, I find it helpful to first create a blank dataset that has the same dimensions and orientation as the other data that you are working with. For example, by creating a copy of an existing image and then switching all the values in that dataset to zero. Starting from the ANALYZE files (i.e., .img/.hdr), you will need to convert them to NIFTI before you can use the script; I use AFNI's 3dcopy and then 3dAFNItoNIFTI to do this.

Once you have copied your file, you can zero out the values by using the script createBlankNIFTI.m and then fill in new values using createNIFTI.m. I'm sure these can both be combined somehow in the future, but there isn't a terribly high demand for this capability yet, so I'll leave it as is.


Creating NIFTI Images from Scratch: CreateNIFTI.m

There may come a time, for whatever reason, where you want to create your own NIFTI image with your own values at each voxel. After all, those processed t-maps and beta maps tend to become a nuisance once in a while, and it feels far better to simply create your own.

First, you need to create a text file with the voxel coordinates and the value at that coordinate. For my script, for example, there are four columns: The first column is the value, and the next three columns are the x-, y-, and z-coordinates for that value. (Note that these are the native coordinates of the image, and not MNI or Talairach coordinates; if you want to use normalized coordinates, open up the image in a viewer, navigate to those normalized coordinates, and write down the corresponding native coordinates.) A sample text file might look something like this:


4 50 40 30 %Insert value of 4 at coordinates 50, 40, 30
5 50 40 31
7 50 40 32
10 50 40 33
500 50 40 35


Once you have saved the text file, you can either use an existing image or create a blank template image using a program like "nifti_tool -create_im ". Then, use the following script with both the image and the text file as arguments (making sure to pass them as strings):

function createNIFTI(imageFile, textFile)


hdr = spm_vol(imageFile);
img = spm_read_vols(hdr);

fid = fopen(textFile);
nrows = numel(cell2mat(textscan(fid,'%1c%*[^\n]')));
fclose(fid);

fid = 0;


for i = 1:nrows
    if fid == 0
        fid = fopen(textFile);
    end
   
    Z = fscanf(fid, '%g', 4);
   
    img(Z(2), Z(3), Z(4)) = Z(1);
    spm_write_vol(hdr, img);
end


This can then be modified to suit your evil purposes.

Tutorial video coming soon; in the meantime, I have some business to attend to, which involves going back home and having fun and laughing with my friends. Just hang tight.

FSL Tutorial 0: Conversion from DICOM to NIFTI


After publishing my last tutorial, I realized that I should probably take a step back and detail how to convert raw scanner images into something that can be used as FSL. This latest walkthrough will show you how to download MRIcron and use one of its tools, dcm2nii, to convert raw scanner image formats such as DICOM or PAR/REC to nifti, which can be used by almost all fMRI software analysis packages.

Note: I've been using Camtasia Studio to make these screencasts, and so far I have been very happy with it. The video editor is simple and intuitive, and making videos isn't too difficult. It runs for $99, which is a little pricey for a screencast tool, but if you're going to be making them on a regular basis and doing tutorials, I would recommend buying it.