Updated Functional Connectivity Tutorial using AFNI

As part of a new course in neuroimaging methods at Haskins Laboratories, I've begun updating videos on topics such as functional connectivity, context-dependent correlations, and how to accept bribes as a reviewer. The first topic we've covered is resting-state functional connectivity, a sophisticated-sounding name designed to make the subject think he is doing something of immense scientific importance by lying still and doing nothing, when in reality it's to distract him while we find out how to hell to hook up the experimental laptop.

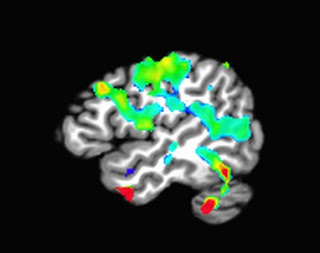
Aside from its usefulness as a stall tactic, resting-state connectivity can also reveal resting-state networks, or correlations between the signal of distant regions of the brain. This provides clues to how structural connectivity - i.e., white matter connections - interact with the BOLD signal, as well as whether differences in resting-state connectivity is a marker for mental disorders such as Alzheimer's or schizophrenia.

The following video takes you step-by-step through functional connectivity analysis, using an online dataset from openfmri.org. One major change from my previous tutorials is condensing all the information into one long video, and providing time markers for each segment in the "Show More" box. This way the viewer can jump around to the information that they need, without having to keep track of several different videos detailing different steps. I hope it's an improvement, and I would like to get feedback.


I've also posted the lecture on resting-state analysis given at Haskins Laboratories on November 3rd. You won't learn much new here that isn't in the video above, but it does have more information. For most of the lecture you can only see the top of my head bobbing around, but that's OK. Eyes on the slides, not the hair.


Exercises:


  1. Set the errts dataset as the underlay, and select "Graph". From the "Opt" menu, select "Write Center." Rename the output 1D file, and use 1dplot to see the timecourse. This can be used as a seed for another connectivity analysis.
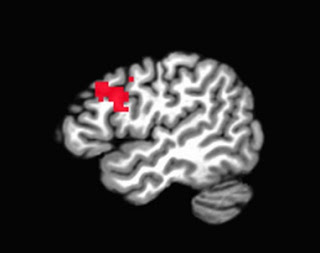
  2. Other resting state networks include the somatosensory network, the visual network, and the language network. Research one of these networks, determine where the hubs are, and run a resting state analysis on a seed placed in that hub.
  3. Run correlations for a group of subjects, convert to z-scores, and do a second-level t-test using uber_ttest.py.
  4. Modify the afni_proc.py script to apply 3dRSFC to your data (see Example 10b in afni_proc.py -help)


AFNI Install on OS X El Capitan

It's been two and half years (three, if you round up) since I uploaded the first videos about AFNI: How to install it, how to run it, how to make it fulfill all your wildest dreams, which may or may not include taking a dollop of Nutella, drying it in the sun, grinding it into a fine powder, and then snorting it.

I was in Rochester for three weeks in July, lodged at a fly-blown hostel. During the days I would talk with researchers and go to meetings and help design studies, but found myself more often on the benches of Eastman Quadrangle, lazily swatting at mosquitoes and feeling the burst of their rubescent abdomens against my skin. I would sit outside where in the distance you could see a church with large oval stained glass and I would think about nothing in particular. The weather in the mornings was perfect, and I took my exercise down by the Erie canal, up around Cobbs Hill Reservoir, and through neighborhoods I didn't know. In the evenings I would make my way downtown for music at the Eastman School and barbecue on the Genesee. And in those nights I worked, obsessively, on those tutorials and videos whose fate had somehow become strangely entangled with mine. Who knew who was reading, who was watching? There was something of an inverted voyeuristic pleasure in thinking about it.

And now here I am, three years later, promoted to seedy manhood and reminiscing of towns and cities; those icy runs on the country lanes of Northfield in windchills of forty below; going to the piano rooms of the Wexner center to practice Scriabin etudes and my beloved, immortal Waldstein; running around Woodlawn field, each loop zero point four-two miles, running ten, twenty, thirty loops at a time, hoping that enough physical exertion would work off a serious infection of heartsickness; crossing the finish line in Indianapolis with burning lungs and knotted calves, surrounded by the vomit of fellow runners, the clock just a shade under two hours and thirty minutes, feeling something break inside me and knowing it was the end of something.

Such were the days, comrades - and how the days have changed! All that I did back then was well enough for its time; but as new wine requires new bottles, so do new operating systems require new installation instructions; and it has come to my attention that several AFNI users are having issues, both technically and emotionally, with getting AFNI to cooperate with Macintosh's newest OS, El Capitan (which is Spanish for, "The Capitan.")

Sensing that urgent action was needed, I turned on my computer, booted up my web browser, and sat with my posterior firmly planted on my chair until somebody else fixed the problem. Fortunately this was not long in coming, and Pete Molfese over at Crash Log has documented how to do it; however, as I am sensitive to how long it takes to click on links, I have reproduced all of the instructions here in full, along with a helpful video which maybe includes a special effect involving my sports jacket.

Here are the steps:

  1. Install XQuartz from xquartz.org (Allows GUIs to run from Unix shells; the "X" symbol that pops up in your dock when you first run AFNI)
  2. Install XCode from the Apple Store
  3. Install Homebrew (a package manager for Mac) using the following command:
    1. For bash: ruby -e "$(curl -fsSL https://raw.githubusercontent.com/Homebrew/install/master/install)"
    2. For tcsh: curl -fsSL https://raw.githubusercontent.com/Homebrew/install/master/install | ruby
    3. Use homebrew to get the following:
      1. The GNU Compiler Collection (GCC) with: brew install gcc --with-all-languages --without-multilib
      2. Pyqt, which you'll need for the .py scripts in AFNI: brew install cartr/qt4/pyqt
      3. GLib, low-level libraries that take care of the little things under the hood: brew install glib
      4. Link libgomp to the correct location using the following:
        1. ln -s /usr/local/Cellar/gcc/5.3.0/lib/gcc/5/libgomp.1.dylib /usr/local/lib/libgomp
        2. Note that the version is continually being updated, so this command may change; for example, replace the 5.2.0 part with 5.3.0. Check the path to /usr/local/Cellar/gcc to see if the path exists. If you link the wrong path, rerun the command with the correct path and the -sf option.
        3. Download the latest AFNI package here, or type the following into your terminal (assuming you are installing version 10.7; replace with whatever version you want to download):

cd

mkdir abin

curl -O http://afni.nimh.nih.gov/pub/dist/tgz/macosx_10.7_Intel_64.tgz

 tar -xzf macosx_10.7_Intel_64.tgz

mv macosx_10.7_Intel_64 abin

rm macosx_10.7_Intel_64.tgz

  1. Paste the following commands from the AFNI install webpage into your terminal (for tcsh shell):

echo 'set path = (/usr/local/bin $path $HOME/abin)' >> .cshrc

echo 'setenv DYLD_FALLBACK_LIBRARY_PATH $HOME/abin' >> .cshrc

echo 'setenv PYTHONPATH /usr/local/lib/python2.y/site-packages' >> .cshrc

source .cshrc

rehash

Conjunction Analysis in AFNI


New Haven may have its peccadillos, as do all large cities - drug dealers, panderers, murder-suicides in my apartment complex, dismemberments near the train station, and - most unsettling of all - very un-Midwestern-like rudeness at the UPS Store - but at least the drivers are insane. Possibly this is a kind of mutually assured destruction pact they have with the pedestrians, who are also insane, and as long as everybody acts chaotically enough, some kind of equilibrium is reached. Maybe.

What I'm trying to say, to tie this in with the theme of the blog, is that conjunction analyses in FMRI allow you to determine whether a voxel or group of voxels passes a statistical threshold for two or more contrasts. You could in theory have as many contrasts as you want - there is no limit to the amount and complexity of analyses that researchers will do, which the less-enlightened would call deranged and obsessive, but which those who know better would label creative and unbridled.

In any case, let's start with the most basic case - a conjunction analysis of two contrasts. If we have one statistical map for Contrast A and another map for Contrast B, we could ask whether there are any voxels common to both A and B. First, we have to ask ourselves, "Why are we in academia?" Once we have caused ourselves enough stress and anxiety asking the question, we are then in the proper frame of mind to move on to the next question, which is, "Which voxels pass a statistical threshold for both contrasts?" You can get a sense of which voxels will show up in the conjunction analysis by simply looking at both contrasts in isolation; in this case, thresholding each by a voxel-wise p-corrected value of 0.01:


Contrast 1

Contrast 2

Conjunction

Note that the heaviest degree of overlap, here around the DLPFC region, is what passes the conjunction analysis.

Assuming that we set a voxel-wise uncorrected threshold of p=0.01, we would have the following code to generate the conjunction map:

3dcalc -prefix conjunction_map -a contrast1 -b contrast2 -expr 'step(a-2.668) + 2*step(b-2.668)'


All you need to fill in is the corresponding contrast maps, as well as your own t-statistic threshold. This will change as a result of the number of subjects in your analysis, but should be relatively stable for large numbers of subjects. When looking at the resulting conjunction map, in this case, you would have three values (or "colors") painted onto the brain: 1 (where contrast 1 passes the threshold), 2 (where contrast 2 passes the threshold), and 3 (where both pass the threshold). You can manipulate the slider bar so that only the number 3 shows, and then use that as a figure for the conjunction analysis.


For more than two contrasts

If you have more than two contrasts you are testing for a conjunction, then modify the above code to include a third map (with the -c option), and multiply the next step function by 4, always going up by a power of 2 as you increase the number of contrasts. For example, with four contrasts:

3dcalc -prefix conjunction_map -a contrast1 -b contrast2 -c contrast 3 -d contrast4 -expr 'step(a-2.668) + 2*step(b-2.668) + 4*step(c-2.668) + 8*step(d-2.668)'


Why is it to the power of 2?

I'll punt on this one and direct you to Gang Chen's page, which has all the information you want, expressed mathematics-style.


Exercises

1. Open up your own AFNI viewer, select two contrasts that you are interested in conjoining, and select an uncorrected p-threshold of 0.05. What would this change in the code above? Why?

2. Imagine the following completely unrealistic scenario: Your adviser is insane, and wants you to do a conjunction analysis of 7 contrasts, which he will probably forget about as soon as you run it. Use the same T-threshold in the code snippet above. How would you write this out?

3. Should you leave your adviser? Why or why not? Create an acrostic spelling out your adviser's name, and use the first letter on each line to spell out a good or bad attribute. Do you have more negative than positive words? What does this tell you about your relationship?

Parametric Modulation with SPM: Why Order Matters

Those who are the youngest children in the family are keenly aware of the disadvantages of being last in the pecking order; the quality of toys, clothes, and nutrition is often best for the eldest children in the family, and gradually tapers off as you reach the last kids, who are usually left with what are called, in parent euphemisms, "hand-me-downs."

In reality, these are things that should have been discarded several years ago due to being broken, unsafe, containing asbestos, or clearly being overused, such as pairs of underwear that have several holes in them so large that you're unsure of where exactly your legs go.

In SPM land, a similar thing happens to parametric modulators, with later modulators getting the dregs of the variance not wanted by the first modulators. Think of variance as toys and cake, and parametric modulators as children; everybody wants the most variance, but only the first modulators get the lion's share of it; the last modulators get whatever wasn't given to the first modulators.

The reason this happens is because when GLMs are set up, SPM uses a command, spm_orth, to orthogonalize the modulators. The first modulator is essentially untouched, but all other modulators coming after it are orthogonalized with respect to the first; and this proceeds in a stepwise function, with the second modulator getting whatever was unassigned to the first, the third getting whatever was unassigned to the second, and so on.

(You can see this for yourself by doing a couple of quick simulations in Matlab. Type x1=rand(10,1), and x2=rand(10,1), and then combine the two into a matrix with xMat = [x1 x2]. Type spm_orth(xMat), and notice that the first column is unchanged, while the second is greatly altered. You can then flip it around by creating another matrix, xMatRev = [x2 x1], and using spm_orth again to see what effect this change has.)

Be aware of this, as this can dramatically alter your results depending on how your modulators were ordered. (If they were completely orthogonal by design, then the spm_orth command should have virtually no impact; but this scenario is rare.) This came to my attention when looking at a contrast of a parametric modulator, which was one of three assigned to a main regressor. In one GLM, the modulator was last, and correspondingly explained almost no variance in the data; while in another GLM, the modulator was first, and loaded on much more of the brain. The following two figures show the difference, using exactly the same contrast and correction threshold, but simply reversing the order of the modulators:


Results window when parametric modulator was the last one in order.


Results window when parametric modulator was the first one in order.

This can be dealt with in a couple of ways:
  1. Comment out the spm_orth call in two scripts used in setting up the GLM: line 229 in spm_get_ons.m, and lines 285-287 in spm_fMRI_design.m. However, this might affect people who actually do want the orthogonalization on, and also this increases the probability that you will screw something up. Also note that doing this means that the modulators will not get de-meaned when entered into the GLM.
  2. Create your own modulators by de-meaning the regressor, inserting your value at the TR where the modulator occurred, then convolving this with an HRF (usually the one in SPM.xBF.bf). If needed, downsample the output to match the original TR.

It is well to be aware of all this, not only for your own contrasts, but to see how this is done in other papers. I recall reading one a long time ago - I can't remember the name - where several different models were used, in particular different models where the modulators were entered in different orders. Not surprisingly, the results were vastly different, although why this was the case wasn't clearly explained. Just something to keep in mind, as both a reader and a reviewer.

I should also point out that this orthogonalization does not occur in AFNI; the order of modulators has no influence on how they are estimated. A couple of simulations should help illustrate this:

Design matrices from AFNI with simulated data (one regressor, two parametric modulators.) Left: PM1 entered first, PM2 second. Right: Order reversed. The values are the same in both windows, just transposed to illustrate which one was first in the model.

More information on the topic can be found here, and detailed instructions on how to construct your own modulators can be found on Tor Wager's lab website.

Blistering Fast Functional Connectivity Analysis with 3dTproject

Because speed is associated with freedom, happiness, and the American way - we want results, we want visible results, and we want them now, darn it! - it is no surprise that neuroimaging analysis is becoming exponentially faster and more efficient. Gone are the days when you could run a slice-timing step, go to bed, and wake up eight hours later when it finally finished. Most likely it crashed, meaning you had to run the entire thing all over again, but that didn't matter - the point was that you at least felt as though you were doing something during that time.

Regardless, we are approaching a radically different era now; and one of the harbingers of that era is AFNI's 3dTproject. Released a few months ago, this tool is now the default in both uber_subject.py and afni_proc.py when you do resting state analyses. It's quicker, more efficient, and allows fewer chances to mess things up, which is a good thing.

To include 3dTproject in your analysis pipeline, simply apply "rest" to the analysis initialization screen when running uber_subject.py, or copy example #9 from the help documentation of afni_proc.py. Under no circumstances should you try running 3dTproject manually, since you, possessing the hand-eye coordination of a cheese burrito, will inevitably make a typo and screw something up. Nevertheless, if you insist on doing it yourself, I recommend using the following code that is automatically generated by the .py scripts:

3dTproject -polort 0 -input pb04.$subj.r*.blur+tlrc.HEAD -censor motion_${subj}_censor.1D -cenmode ZERO -ort X.nocensor.xmat.1D -prefix errts.${subj}.tproject

Needless to say, you will have to have already run your preprocessing steps and have run 3dDeconvolve with the -x1D_stop option to generate the necessary matrices.


The Next Three Months

Comrades, friends, visionaries, thinkers, and fortune-hunters,

This is, barring any unforeseen circumstances, such as meteor strike, death by Nutella overdose, or floss strangulation, my last summer of graduate school at Indiana University; and I will be spending the majority of that time working on my dissertation to escape this durance vile.

However, I have also been thinking (which should worry you), and it appears to me that what this site has become is a pastiche of training and tutorials which deal with small, isolated problems: How to do this for your data, what it means, and then moving on to the next, often without a clear link between the two, and often with a joke or two thrown in for good measure as a diversion to briefly suspend the terror that haunts your guilt-ridden minds. No doubt some come here only to receive what goods they need and then ride on, I no more than a digital manciple supplying a growing, ravenous demand for answers. Some may come here to merely carp and backbite at my charlatanry; others out of a morbid curiosity for ribald stories and for whatever details about my personal life they can divine; and still others, perhaps, see something here that warms something inside of them.

What is needed, however, is a focus on what ties them all together; not only technique and methods, but ways of thinking that will stand you in good stead for whatever you wish to figure out, neuroimaging or otherwise. And, as new wine requires new bottles, a higher-order website is needed to serve as a hub where everything that I have created, along with other materials, lies together; where one is able to quickly find the answers that they need, whether through videos or links to the appropriate tools tools and scripts, along with educational material about the most important concepts to grasp before moving forward with a particular problem. Problem-solution flowcharts, perhaps. Applets that quiz you and record scores, possibly. And, of course, links to my haberdashers. (You think I am making a fortune? Ascots and cufflinks cost more, and without them one would not be in good taste.)

So much for exhortations. Actually putting this into practice is the difficult part, and is an effort that could, quite possibly, kill me from exhaustion, or at least cause me to procrastinate endlessly. We shall see. At least I have taken a few steps towards starting, which includes looking at some HTML code and prodding at it thoughtfully through the computer screen with my finger. I'm not exactly sure how HTML works; but at least whenever I am working with it, I take pains to look very concerned and deep in thought.

However, before this endeavor there are still a few matters left to discuss, which I had earlier promised but still haven't delivered yet. In some states I would be hanged for such effrontery; but your continued patience means that either 1) You really, really don't want to read the manual (and who can blame you?), or 2) You find it worth the wait. Regardless, and whatever my behavior suggests to the contrary, I do want to help out with these concepts, but I do not always get to everyone's questions. Sometimes too much time passes, and they are gradually swept into the vast oubliette of other stuff I tend to forget; other times, some emails do in fact miss me, and aren't opened until much later, when it would seem too late to reply. In any case, I apologize if I have forgotten any of you. Below is a brief schedule of what I plan to cover:

1. Independent Components Analysis with FSL
2. Beta Series Analysis in SPM
3. Explanation of GLMs
4. Multiple Regression in SPM
5. MVPA in AFNI
6. An explanation of GSReg, and why it's fashionable to hate it, using example data on the AFNI website
7. Overview of 3dTproject

And a couple of minor projects which I plan to get to at some point:

1. Comparison of cluster correction algorithms in SPM and AFNI
2. How to simulate Kohonen nets in Matlab, which will make your nerd cred go through the roof

We will start tomorrow with Independent Components Analysis, a method considerably different from seed-based analysis, starting with the differences between the two and terminating at a destination calamitous beyond all reckoning; and then moving on to Beta Series analysis in SPM, which means doing something extremely complicated through Matlab, and plagiarizing code from one of my mentors; and then the rest of it in no set order, somewhere within the mists beyond right knowing where the eye rolls crazily and the lip jerks and drools.


Automating 3dReHo

As a rider to our tale of Regional Homogeneity analysis, we last discuss here how to automate it over all the subjects of your neuroimaging fiefdom. Much of this will look similar to what we have done with other analyses, but in case you don't know where to start, this should help get you going.


#!/bin/tcsh

setenv mask mask_group #Set your own mask here
setenv subjects "0050773 0050774" #Replace with your own subject numbers within quotations

foreach subj ($subjects)

cd {$subj}/session_1/{$subj}.results #Note that this path may be different for you; change accordingly

3dReHo -prefix ReHo_{$subj} -inset errts.{$subj}+tlrc -mask mask_group+tlrc #Perform Regional Homogeneity analysis

#Convert data to NIFTI format
3dAFNItoNIFTI ReHo_{$subj}+tlrc.HEAD
3dAFNItoNIFTI {$mask}+tlrc.HEAD

#Normalize images using FSL commands
setenv meanReHo `fslstats ReHo_{$subj}.nii -M`
setenv stdReHo `fslstats ReHo_{$subj}.nii -S`

fslmaths ReHo_{$subj}.nii -sub $meanReHo -div $stdReHo -mul mask_group.nii ReHo_Norm_{$subj}

gunzip *.gz

#Convert back to AFNI format
3dcopy ReHo_Norm_{$subj}.nii ReHo_Norm_{$subj}

end

Creating Beta Series Correlation Maps

The last few steps for creating beta series correlation maps is practically identical to what we did before with other functional connectivity maps:

1. Load your beta series map into the AFNI interface and set it as the underlay;
2. Click on "Graph" to scroll around to different voxels and examine different timeseries;
3. Once you find a voxel in a region that you are interested in, write out the timeseries by clicking FIM -> Edit Ideal -> Set Ideal as Center; and then FIM -> Edit Ideal -> Write Ideal to 1D File. (In this case, I am doing it for the right motor cortex, and labeling it RightM1.1D.)
4. Note that you can also average the timeseries within a mask defined either anatomically (e.g., from an atlas), or functionally (e.g., from a contrast). Again, the idea is the same as what we did with previous functional connectivity analyses.
5. Use 3drefit to trick AFNI into thinking that your beta series map is a 3d+time dataset (which by default is not what is output by 3dbucket):

3drefit -TR 2 Left_Betas+tlrc

6. Use 3dfim+ to create your beta series correlation map:

3dfim+ -input Left_Betas+tlrc -polort 1 -ideal_file RightM1.1D -out Correlation -bucket RightM1_BetaSeries

7. Convert this to a z-score map using Fisher's r-to-z transformation:

3dcalc -a Corr_subj01+tlrc -expr 'log((1+a)/(1-a))/2' -prefix Corr_subj01_Z+tlrc

8. Do this for all subjects, and use the results with a second-level tool such as 3dttest++.

9. Check the freezer for HotPockets.

That's it; you're done!


Introduction to Beta Series Analysis in AFNI

So far we have covered functional connectivity analysis with resting-state datasets. These analyses focus on the overall timecourse of BOLD activity for a person who is at rest, with the assumption that random fluctuations in the BOLD response that are correlated implies some sort of communication happening between them. Whether or not this assumption is true, and whether or not flying lobsters from Mars descend to Earth every night and play Scrabble on top of the Chrysler Building, is still a matter of intense debate.

However, the majority of studies are not resting-state experiments, but instead have participants perform a wide variety of interesting tasks, such as estimating how much a luxury car costs while surrounded by blonde supermodels with cleavages so ample you could lose a backhoe in there. If the participant is close enough to the actual price without going over, then he -

No, wait! Sorry, I was describing The Price is Right. The actual things participants do in FMRI experiments are much more bizarre, involving tasks such as listening to whales mate with each other*, or learning associations between receiving painful electrical shocks and pictures of different-colored shades of earwax. And, worst of all, they aren't even surrounded by buxom supermodels while inside the scanner**.

In any case, these studies can attempt to ask the same questions raised by resting-state experiments: Whether there is any sort of functional correlation between different voxels within different conditions. However, traditional analyses which average beta estimates across all trials in a condition cannot answer this, since any variance in that condition is lost after averaging all of the individual betas together.

Beta series analysis (Rissman, Gazzaley, & D'Esposito, 2004), on the other hand, is interested in the trial-by-trial variability for each condition, under the assumption that voxels which show a similar pattern of individual trial estimates over time are interacting with each other. This is the same concept that we used for correlating timecourses of BOLD activity while a participant was at rest; all we are doing now is applying it to statistical maps where the timecourse is instead a concatenated series of betas.

Figure 1 from Rissman et al (2004). The caption is mostly self-explanatory, but note that for the beta-series correlation, we are looking at the amplitude estimates, or peaks of each waveform for each condition in each trial. Therefore, we would starting stringing together betas for each condition, and the resulting timecourse for, say, the Cue condition would be similar to drawing a line between the peaks of the first waveform in each trial (the greenish-looking ones).

The first step to do this is to put each individual trial into your model; which, mercifully, is easy to do with AFNI. Instead of using the -stim_times option that one normally uses, instead use -stim_times_IM, which will generate a beta for each individual trial for that condition. A similar process can be done in SPM and FSL, but as far as I know, each trial has to be coded and entered separately, which can take a long time; there are ways to code around this, but they are more complicated.


Assuming that you have run your 3dDeconvolve script with the -stim_times_IM option, however, you should now have each individual beta for that condition output into your statistics dataset. The last preparation step is to extract them with a backhoe, or - if you have somehow lost yours - with a tool such as 3dbucket, which can easily extract the necessary beta weights (Here I am focusing on beta weights for trials where participants made a button press with their left hand; modify this to reflect which condition you are interested in):

3dbucket -prefix Left_Betas stats.s204+tlrc'[15..69(2)]'

As a reminder, the quotations and brackets mean to do a sub-brik selection; the ellipses mean to take those sub-briks between the boundaries specified; and the 2 in parentheses means to extract every other beta weight, since these statistics are interleaved with T-statistics, which we will want to avoid.


Tomorrow we will finish up how to do this for a single subject. (It's not too late to turn back!)


*Fensterwhacker, D. T. (2011). A Whale of a Night: An Investigation into the Neural Correlates of Listening to Whales Mating. Journal of Mongolian Neuropsychiatry, 2, 113-120.

**Unless you participate in one of my studies, of course.

Extracting and Regressing Out Signal in White Matter and CSF

A man's at odds to know his mind because his mind is aught he has to know it with. He can know his heart, but he don't want to. Rightly so. Best not to look in there.


-The Anchorite
==============

In the world of FMRI analysis, certain parts of the brain tend to get a bad rap: Edges of the brain are susceptible to motion artifacts; subcortical regions can display BOLD responses wholly unlike its cortical cousins atop the mantle; and pieces of tissue near sinuses, cavities, and large blood vessels are subject to distortions and artifacts that warp them beyond all recognition. Out of all of the thousands of checkered cubic millimeters squashed together inside your skull, few behave the way we neuroimagers would like.

Two of the cranium's worst offenders, who also incidentally make up the largest share of its real estate, are white matter and cerebrospinal fluid (CSF). Often researchers will treat any signal within these regions as mere noise - that is, theoretically no BOLD signal should be present in these tissue classes, so any activity picked up can be treated as a nuisance regressor.*

Using a term like "nuisance regressor" can be difficult to understand for the FMRI novitiate, similar to hearing other statistical argot bandied about by experienced researchers, such as activity "loading" on a regressor, "mopping up" excess variance, or "faking" a result. When we speak of nuisance regressors, we usually refer to a timecourse, one value per time point for the duration of the run, which represents something we are not interested in, or are trying to divorce from effects that we have good reason to believe actually reflect the underlying neural activity. Because we do not believe they are neurally relevant, we do not convolve them with the hemodynamic response, and insert them into the model as they are.

Head motion, for example, is one of the most widely used nuisance regressors, and are simple to interpret. To create head motion regressors, the motion in x-, y-, and z-directions are recorded at each timepoint and output into text files with one row per timepoint reflecting the amount of movement in a specific direction. Once these are in the model, the model will be compared to each voxel in the brain. Those voxels that show a close correspondence with the amount of motion will be best explained, or load most heavily, on the motion regressors, and mop up some excess variance that is unexplained by the regressors of interest, all of which doesn't really matter anyway because in the end the results are faked because you are lazy, but even after your alterations the paper is rejected by a journal, after which you decide to submit to a lower-tier publication, such as the Mongolian Journal of Irritable Bowel Syndrome.

The purpose of nuisance regressors, therefore, is to account for signal associated with artifacts that we are not interested in, such as head motion or those physiological annoyances that neuroimagers would love to eradicate but are, unfortunately, necessary for the survival of humans, such as breathing. In the case of white matter and CSF, we take the average time course across each tissue class and insert - nay, thrust - these regressors into our model. The result is a model where signal from white matter and CSF loads more onto these nuisance regressors, and helps restrict any effects to grey matter.

==============

To build our nuisance regressor for different tissue classes, we will first need to segment a participant's anatomical image. This can be done a few different ways:

1. AFNI's 3dSeg command;
2. FSL's FIRST command;
3. SPM's Segmentation tool; or
4. FreeSurfer's automatic segmentation and parcellation stream.

Of all these, Freesurfer is the most precise, but also the slowest. (Processing times on modern computers of around twenty-four hours per subject are typical.) The other three are slightly less accurate, but also much faster, with AFNI clocking in at about twenty to thirty seconds per subject. AFNI's 3dSeg is what I will use for demonstration purposes, but feel free to use any segmentation tool you wish.

3dSeg is a simple command; it contains several options, and outputs more than just the segmented tissue classes, but the most basic use is probably what you will want:

3dSeg -anat anat+tlrc

Once it completes, a directory called "Segsy" is generated containing a dataset labeled "Classes+tlrc". Overlaying this over the anatomical looks something like this:


Note that each tissue class assigned both a string label and a number. The defaults are:

1 = CSF
2 = Grey Matter
3 = White Matter

To extract any one of these individually, you can use the "equals" operator in 3dcalc:

3dcalc -a Classes+tlrc -expr 'equals(a, 3)' -prefix WM

This would extract only those voxels containing a 3, and dump them into a new dataset, which I have here called WM, and assign those voxels a value of 1; much like making any kind of mask with FMRI data.


Once you have your tissue mask, you need to first resample it to match the grid for whatever dataset you are extracting data from:

3dresample -master errts.0050772+tlrc -inset WM+tlrc -prefix WM_Resampled

You can then extract the average signal at each timepoint in that mask using 3dmaskave:

3dmaskave -quiet -mask WM_Resampled+tlrc errts.0050772 > WM_Timecourse.1D

This resulting nuisance regressor, WM_Timecourse.1D, can then be thrust into your model with the -stim_files option in 3dDeconvolve, which will not convolve it with any basis function.

To check whether the average timecourse looks reasonable, you can feed the output from the 3dmaskave command to 1dplot via the-stdin option:

3dmaskave -quiet -mask WM_Resampled+tlrc errts.0050772 | 1dplot -stdin


All of this, along with a new shirt I purchased at Express Men, is shown in the following video.


*There are a few, such as Yarkoni et al, 2009, who have found results suggesting that BOLD responses can be found within white matter, but for the purposes of this post I will assume that we all think the same and that we all believe that BOLD responses can only occur in grey matter. There, all better.